- 817Shares

Inserting circles or bottoms with rounded corners to a tube can often give a headache to beginner sewers. Why do you always feel like there is too much fabric on one piece? You’ll find the answer in this article.


How to sew a flat circle into a tube?
We’ve defined a problem, now let’s find a solution. Although, it can be done without any additional treatment, the following two techniques will certainly make this task easier.
Enlarging the circumference of the tube
The first thing you can do is to enlarge the circumference of the tube. It sounds like magic, but it simply means clipping the seam allowances of the tube.
When cliping the seam allowances, leave a little distance from the sewing line (about 1-2mm / 1/16 in). Also, before clipping you can make an auxiliary stitching along the sewing line, which will provide additional reinforcement for your fabric.
Now spread the seam allowances so that they match the circle or rounded edge of your piece. Sew the pieces together – if you made the auxiliary stitching, guide your new seam line along it but on the inside. I’ve used this technique when I was sewing my heart shaped pillow.


Reducing the circumference of a circle or the length of an arc

To reduce the circumference of a rounded element, you have to gather its edges. Of course, it’s not a decoration that’s visible outside, this is only an auxiliary gathering.
To gather the seam allowances make a stitching along the rounded sections, sewing about 2-3 mm / 1/8 in from the edge. It doesn’t have to be very precise, the important thing is to stay within the seam allowances. Leave the ends of your thread loose.
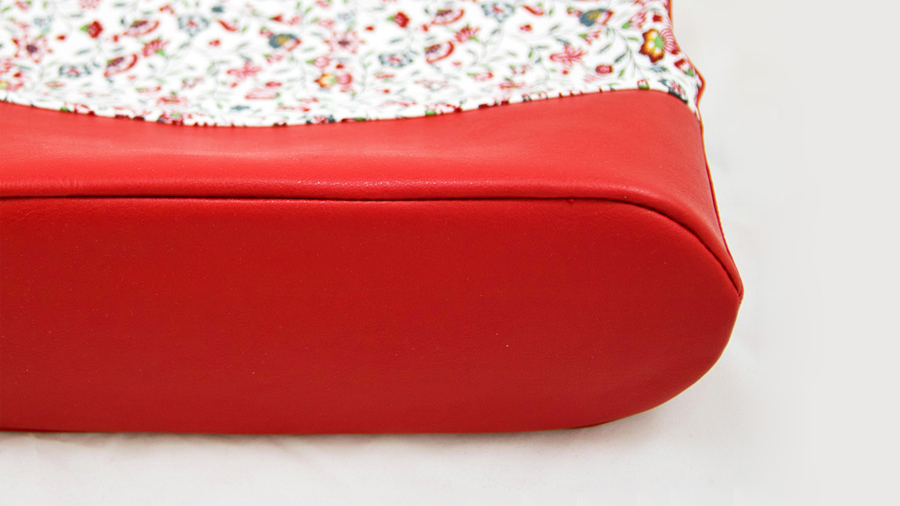
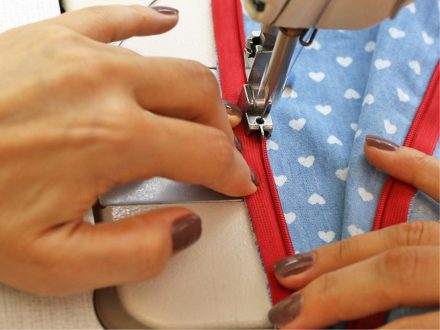
Pull one of the ends and gather the fabric, then distribute the gathering along the curves. Insert the gathered piece into the tube. First, match the notches on both pieces (if there are any), then pin the straight sections. Finally, match the rounded corners – at this point the corners should fit into their place easily. When sewing circle, match the notches and then work your way around, pinning remaining sections. If you’re working with thicker fabric like faux leather, it’s best to baste the curved sections (within the seam allowances). This will prevent the fabric from moving during sewing.
Sew the pieces together, sewing with the rounded piece facing up. After making the seam, turn your work to the right side and make sure that there are no wrinkles or tucks. Press the seam (if your fabric allows it).


That’s it, hope you liked this post. Let me know in the comment section what do you think about it 🙂
- 817Shares
Perfect just the information I was looking for thanks
Really, It Was Very Helpful For ME.