- 11Shares

Practice makes perfect – invisible zippers aren’t as scary as they seem. Test the whole sewing process on some fabric scraps and the next project will go much smoother.
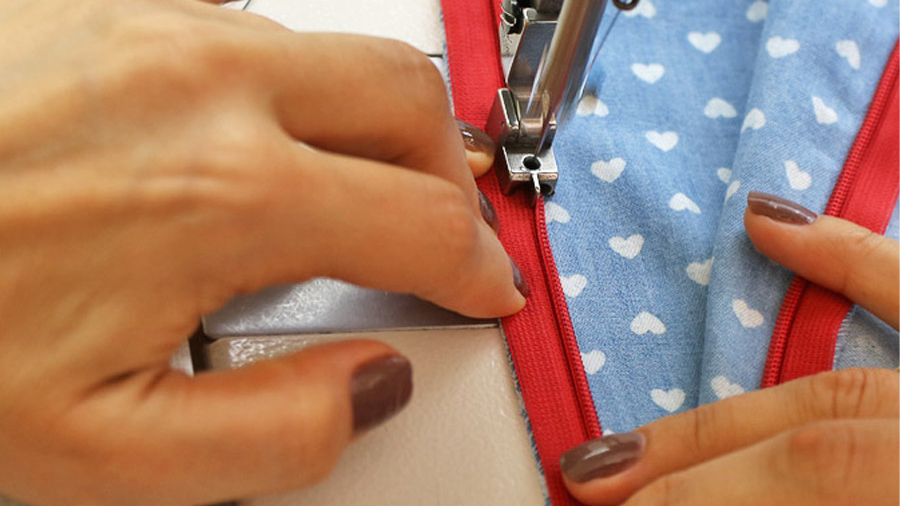
It is best to use a dedicated, invisible zipper foot to install an invisible zipper. Depending on your sewing machine, such foot can vary slightly in appearance from those shown below.


The back of your skirt (or some other garment) should be prepared as follows:
- the back pieces are sewn together up to the notch (the end of the zipper)
- the zipper placement area is reinforced with an interfacing
- the back notch is transfered from a pattern to the fabric
- the edges are secured with overlock or zigzag stitch

The zipper should extend past the notch (3) at least 2 cm (4/5 in).
Installing an invisible zipper – step by step
1. Trim the zipper’s tape from the top, so that the distance from the beginning of the tape to the zipper’s teeth equals the width of your seam allowances – I recommend using 1 cm (3/8 in) [itg-glossary glossary-id=”318″]seam allowances[/itg-glossary], it makes sewing zippers so much easier.


2. Unzip the zipper and place its right side to the right side of the fabric, aligning the zipper with the edges as shown in the photo. Thanks to the previous trimming you won’t have problems with aligning it at the top. Optionally you can transfer the notch location onto the zipper, so you can make sure that the fabric wasn’t eased or stretched during sewing.


3. Fold back the zipper’s teeth slightly and sew the zipper all the way down to the notch. Properly made seam should overlap the back seam a little or end up very close to it, because the zipper is a continuation of the back seam.


4. Sew the other side of the zipper the same way as the first one.


5. Drag the slider of the zipper through the hole which was formed at the end of the zipper.


Of course, with bigger seam allowances your zipper should be sewn at a proper distance from the edge. In this case you lose the ability to align the zipper to the edge of the fabric, so I do not recommend it.


Shortening an invisible zipper
If your zipper is the right length – go to the step 9. If it’s longer than needed, you can shorten it as follows:
6. Trim the zipper, leaving about 2 cm (4/5 inch) at the end. Then trim the zipper’s teeth just a little.


7. Using matches or a lighter melt the cut ends – both tape and teeth.


8. Secure the zipper’s end by sewing it with your sewing machine.


Fastening the zipper
If you’re sewing a garment with a lining – fasten the zipper just at the end, otherwise sew it all the way. This will prevent ripping the zipper seam during use, and the zipper won’t snag your lingerie.
9. Sew the zipper and seam allowances one more time, but this time closer to the edge.


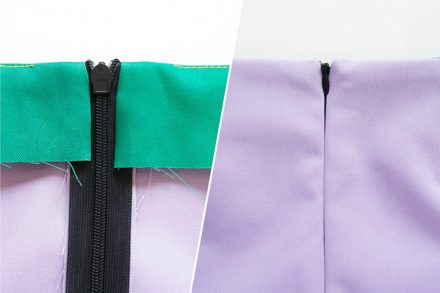
The only thing left to do is to iron the garment. If you’re planning to make a back slit in your skirt or dress – don’t clip the seam allowance, just press it as shown in the photo.


A small tip at the end – even professionals make mistakes, so if you didn’t sew your zipper perfectly the first time, just rip it out, and try again. Ripping is a completely natural process in sewing, and there is no other way but to accept it 🙂
- 11Shares

Leave a Reply